
You can view and edit data saved to a table by accessing the editor within the Data Designer interface. To do this, select a table from the Definitions tab and click the Browse Data button.
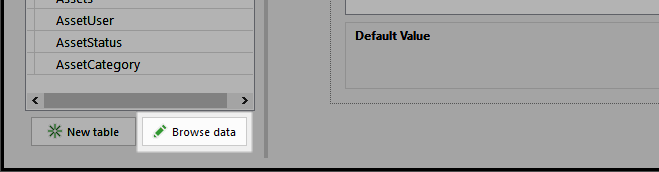
Accessing the Table Data Editor for a selected table.
This will open a new interface consisting of two tabs. The first of these is Filter Criteria, where you can specify conditions to filter the data rows you want to view.
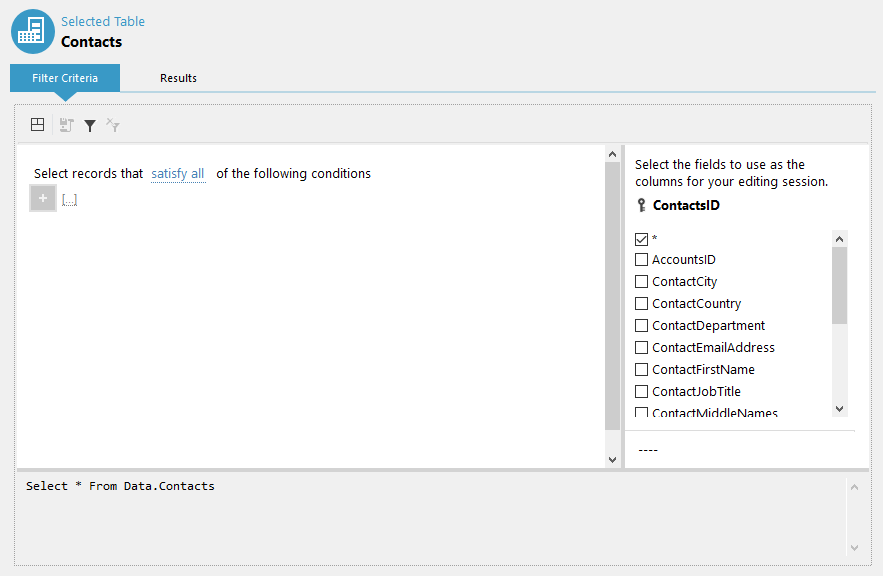
The Filter Criteria tab.
To see the data contained in the table, you can switch to the Results tab. Initially, this will only contain a single button labelled Fetch Your Data.

The Results tab containing a prompt to fetch the table's data.
Clicking this will return all rows that match the conditions specified in the Filter Criteria tab. If you did not add any conditions in the former tab, Results will populate to show every row of data in the table. When data is added to a table—which can be done using a WriteData expression or directly from this interface—it will appear here.
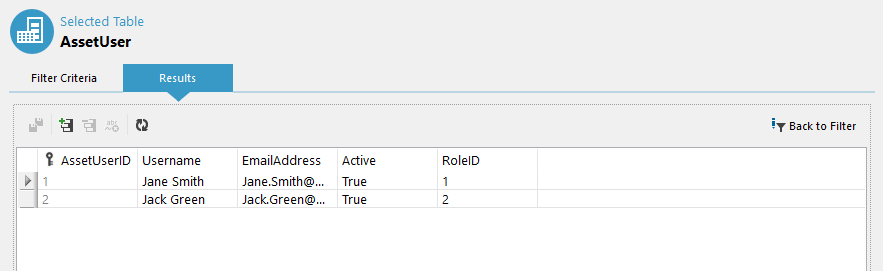
The Table Data Editor where you can view your table's data.
Above the rows of data you will find a toolbar menu, containing the following options:
| Icon | Option | Description | Further Reading |
|---|---|---|---|

|
Save Changes | Saves all updates that have been made and commits the changes to the repository. | |

|
Add New Row |
Creates a new row in the table. |
Adding Data Rows |

|
Remove Row | Permanently deletes all selected rows. | Deleting Data Rows |

|
Refresh Data | Refreshes the table to show the most recent data. |
To learn how to add and modify data in a table, refer to the following topics:
| Description | Further Reading |
|---|---|
| Create a filter to narrow down which columns and rows to view when browsing saved data. | Filtering Data Rows |
| Add rows of data using the Table Data Editor. | Adding Data Rows |
| Modify data in the existing rows. | Editing Row Data |
| Permanently delete rows of table data. | Deleting Data Rows |